From the Boresight Line: Flareouts
“Gunner, Sabot tanks, near tank.”
“Identified, Range 1600.”
“Up.”
“Fire.”
“On the way.”
Boom!
The tower announces “cease fire!” over the radio. You just had a flareout. Reports of flareouts from the armor community are becoming a more common occurrence as of late.
A flareout is a secondary blast envelope at the muzzle end of the gun tube that could be a precursor to a flareback. To mitigate the possibility of a flareback or flareout, closer attention to the performance of maintenance on the bore evacuators must occur.
A flareback, in simple terms, is unspent propellant from the round that mixes with oxygen and creates a fireball from the breechblock after the round has been fired during case base ejection. A flareout is a secondary blast envelope at the muzzle end of the gun. While the gun is doing what it is supposed to do with a flareout, the situation is ideal for a flareout to become a flareback.
So what to do?
After a flareback or flareout is experienced, follow the procedures outlined in Technical Manual (TM) 9-2350-388-10-3, WP 0464, Page 0464-4, “Flareback of Burning Gas into Turret after Firing Main Gun.” There are three steps, and the procedure is all maintenance-related.
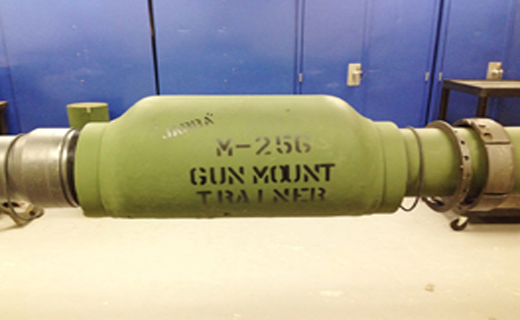
The M1A1/ M1A2 main battle tanks have a M256A1 gun tube that uses an eccentric pressure scavenging system, which aids in the removal of spent propellant gases from the gun tube. “Eccentric” means that the gun and bore evacuator do not share a common center. This allows the gun to be depressed lower over the back deck of the tank.
As the projectile travels down the gun tube, it passes the bore-evacuator holes. Propellant gases expand into the bore evacuator, storing pressure to aid in the evacuation of spent propellant gases. Pressure varies due to round type and atmospheric conditions. The first round can reach up to 200 pounds per square inch in the bore evacuator because of a secondary reaction with the air in the evacuator. Bore-evacuator holes are drilled at 30-degree angles toward the muzzle end of the gun tube to allow the flow of gases to exit.
Once shot exit occurs, rapidly expanding propellant gases create a blast envelope at the gun’s muzzle. Flareouts create a second blast envelope. This is an indication that not all gases are being spent at the proper time. While, in this case, the bore evacuator is working to expel all unspent gases, the fear is that a flareback may occur at anytime.
The bore evacuator asserts itself as gun-tube pressure drops and allows the gases to exit the muzzle end of the gun. Normally, that is the white puff of smoke you see at the end of firing. The flareout is that white puff of smoke that has turned into a second blast envelope. The scavenging part of the system is the difference between low pressure from the breech opening to the bore-evacuator holes and high pressure from the bore-evacuator holes to the muzzle end of the gun, creating a partial vacuum.
Past unit-maintenance standard operating procedures would have us clean the bore evacuator and then slap a healthy coat of GAA, or “grease aircraft automotive,” on it. The thinking process behind this is it would prevent rust and be easier to clean after firing. This practice could potentially clog up the bore-evacuator holes, not allowing the bore evacuator to do its job. The proper way to maintain the bore evacuator is to use “cleaner lubricant and preservative” (CLP), National Stock Number (NSN) 9150-01-054-645. Using CLP provides rust protection while limiting the chance of the bore-evacuator holes becoming clogged.
Apart from enforcing safety, equipment inspection is potentially one of the most important areas a tank crewman can focus on. According to TM 9-2350-388-10-3, WP 0547, Page 0547-2 (“Service Bore Evacuator”), note the following warnings and then follow the procedures step by step.
Warning
“Use extreme care when servicing bore evacuator. An improperly assembled or damaged bore evacuator (punctured, dented or cracked) can result in a buildup of smoke and toxic fumes in the tank or a flareback of burning gases into the turret. These are hazardous conditions that can result in death or injury.
“Tank gun tubes which have fired depleted uranium (DU) ammunition may have DU residue on the inside surfaces and the bore evacuator. This contamination may be both removable and fixed (remaining for the life of the tube). DU emits very low levels of radiation. Personnel cleaning the gun tube or bore evacuator must wear rubber/ latex gloves (even if the gloves have been worn, always wash hands after cleaning gun tube). Do not touch gloves to face or other parts of body. Wash hands after removing gloves. Depress the gun tube as much as possible to prevent contaminated cleaning fluid from flowing into breech or crew compartment.
“Rags and cleaning fluid generated during maintenance on the bore evacuator or during the gun-tube cleaning process must be disposed of as low-level radioactive waste. Mop up all excess cleaning fluid with rags, and (double) bag all trash, including gloves, in two plastic bags. Ensure bag is tagged as containing radioactively contaminating material. Be sure the tag lists contents (gloves, rags, towels, etc.) and isotope (DU). Contact your local radiation-protection officer for disposal instructions.”
It is vital to follow procedure as outlined to prevent missing a step. Here at the Abrams Master Gunner Course, we have a saying: “Read, Understand and Do.” I want to explain what to check and what deficiencies you should try to identify.
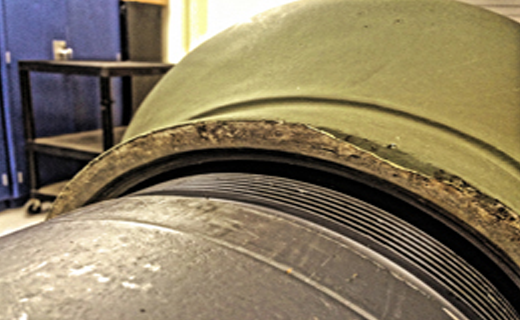
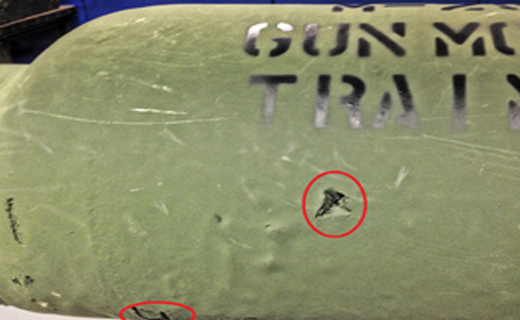
Once everything is disassembled (Figure 1), start with inspection of the bore evacuator itself. Check the bore evacuator for any type of damage (Figure 3). Check for any rub marks, dents, chips or cuts on any part of the bore evacuator. Check around the angled seat ends (Figure 2) for any type of damage. Any damage to this area will not allow the seals to seat properly and will allow gases to leak out. The bore evacuator will not pressurize properly and may cause a loss of velocity of the shot or possible flareback. If gases are leaking, you may see black-powder marks around seal areas. This is a sign that seals or bore evacuator may be damaged.
While checking the bore evacuator, look at the bore evacuator itself and pay attention to the bottom portion. As you drop the gun over the back deck, your bore evacuator takes a beating. Report any faults found to field maintenance.
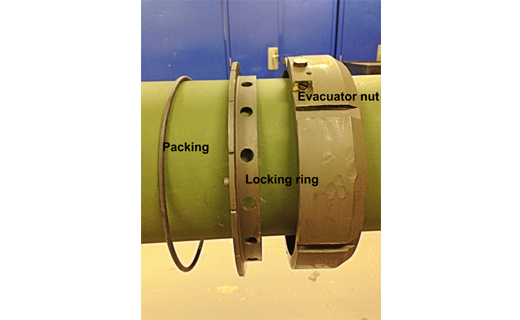
After inspecting the bore evacuator, inspect the seals, which are called packing (Figure 4) in the TM. Check them for tears, cuts, gouges or deformation. Don’t stretch them out when removing and installing them. Packing should be replaced semiannually in accordance with the TM 9-2350-264-1-3 mandatory-replacement-parts list, Page 0511-102, Table 2, Item 27. If new packing is required, notify field maintenance.
Inspect the mounting hardware, paying attention to the evacuator nut (Figure 4, collar) for damage and ensuring it is not cross-threaded. Check the plunger to ensure it moves freely. Pay attention to the screw head that it is not stripped. Look at the retaining ring for the locking pins (Figure 4); ensure they are present and not damaged.
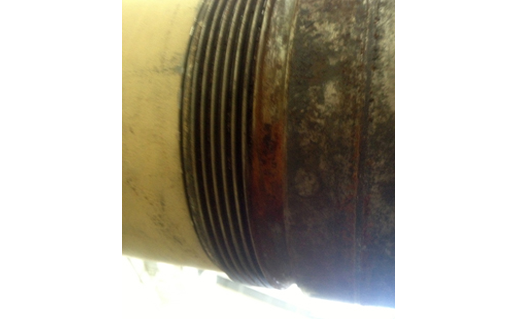
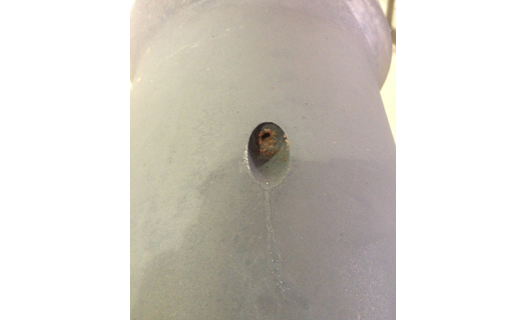
Next, move to the outside part of the gun tube, where the bore evacuator sits during normal operations (Figure 5). Inspect it for corrosion. If pitting exceeds .02 inches deep on unpainted, or .04 inches deep on painted surfaces, and covers 80 percent of the surface area, notify field maintenance. Check the bore-evacuator holes (Figure 6) to ensure they are not clogged. Pipe cleaners (NSN 9920-00-292-994) are the key to success. Use only CLP to clean and lubricate the surface and the hardware parts. You can use a light coat of GAA (NSN 9150-00-145-026) on the packing.
Performing all maintenance and scheduling maintenance procedures in accordance with the proper TMs will keep the tank in operating condition. The checks are to find, correct or report problems. This will prevent shortcomings on the equipment you are assigned. Understanding the importance of maintaining your equipment will ensure the readiness of the equipment and the unit.
 email
email print
print